Forms
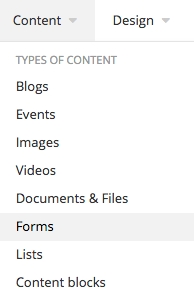
Forms can be accessed by going to Content > Forms from your dashboard.
Export Form Responses to Spreadsheet
Document Uploads in Forms
The document upload widget needs to know what file type to expect for optimal results. If you get a blank document submitted in a form, you might check the settings.
Form Rules (Dynamic Forms)
The most common use for this has been to send a notification to a different salesperson for each location.
Another use case is to show some dynamic content based on a condition.
Form Modal Feature
Modals help your customers stay on the page to continue shopping. We have this built-in to our showrooms. But, this functionality can be helpful throughout your site. So, we're building a modal widget that will allow this for a form on any page.
Custom Subject Line for Contact Us form
A Custom Subject Line option for the Contact Us form can be accessed through the Brow Navigation

Adding Get a Quote form to Showrooms
To add a Get a Quote form to a showroom: Click Pages Select the desired showroom page
Get a Quote
Drag the Form widget onto the page
 Click Edit on the form widget
 Select the Get a Quote form (name may vary)
Click More options
Under CSS classes enter the following:CSS: get-a-quote d-none shortline-get-a-quote
 Click the Advanced button
Click the Model button
 Under UseAjaxSubmit change the field from False to True
 Click the Save button
Click the Publish button on your page

Adding Special Offer Registration form to Showroom
To add a Special Offer Registration form to a showroom: Click Pages Select the desired showroom page
Special Offer Registration
Drag the Form widget onto the page
 Click Edit on the form widget
 Select the Special Offer Registration form
Click More options
Under CSS classes enter the following:
special-offer-form d-none
 Click the Advanced button
Click the Model button
 Under UseAjaxSubmit change the field from False to True
 Click the Save button
Click the Publish button on your page
Creating a Form
1. Open the Content tab on the toolbar. Next, click the Form link under Types of Content.
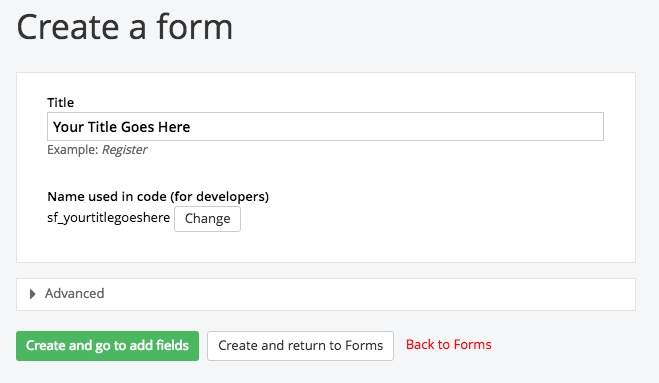
 2. Click the green Create a Form Button.
 3. Give the new form a title. Click the green Create and Go to Add Fields Button.
 4. The form editor will open. Add content to your form by dragging widgets from the right hand side of the screen into the Body Block. (5 - 19 is an example of using the form editor.)
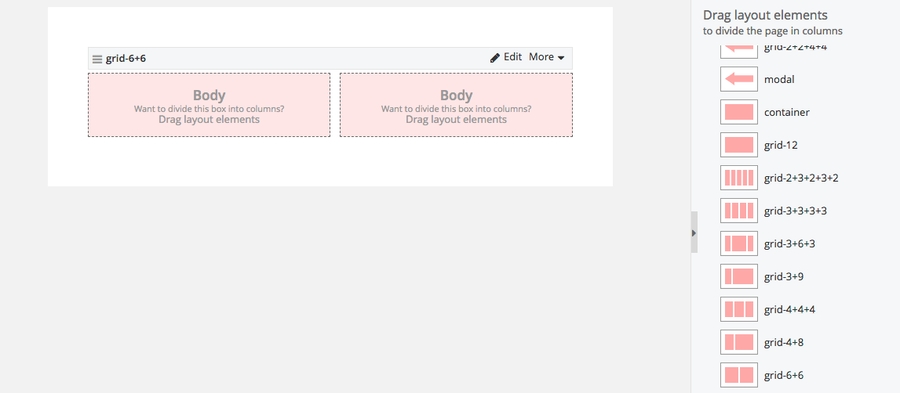
5. Click the layout link in the top right hand corner. Here you can choose different grids. For this example we will start with a 6 x 6 grid. Click the 6 x 6 grid and drag it to the Body content area. This will split the body into two content sections.
 6. Click the Content Link in the top right hand corner of the screen.
7. Drag a Text Box to the top left body block.
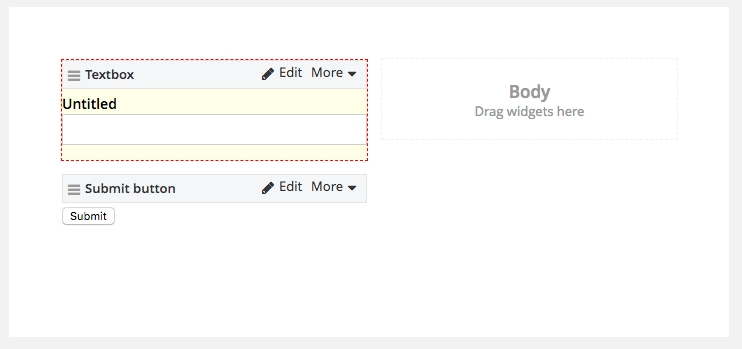 8. Click edit to give the Text Box a title. Title this Text Box "Name."
9. Click Save.
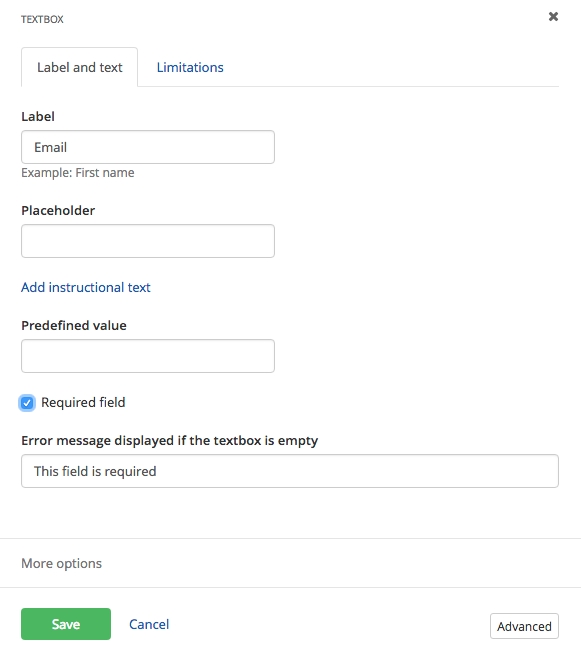
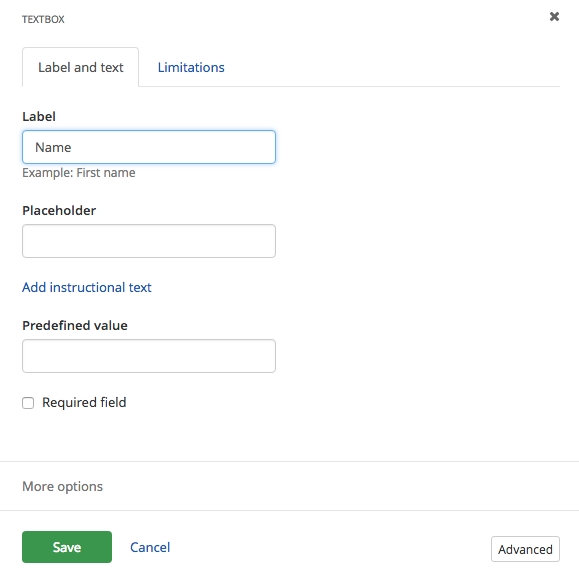 10. Add a Text Box to the right body block. Title this text box Email. Make this text box required by checking the required field box.
* Making an email address or phone number field required is recommended. This will ensure your ability to respond to completed forms.
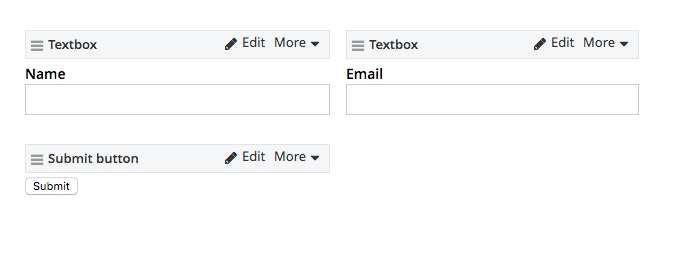
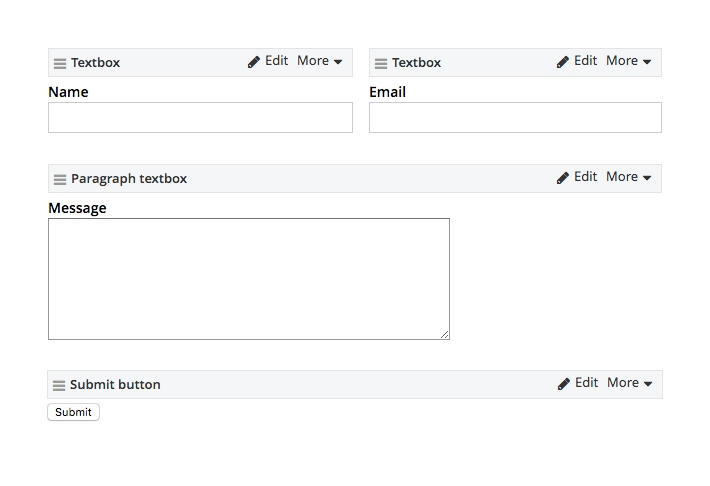
 At this stage your form should look like the image below.
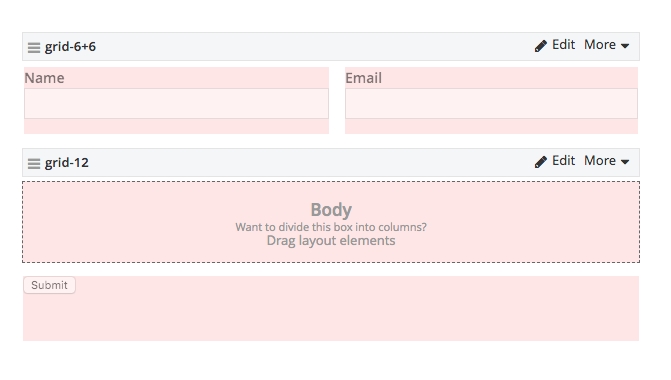
 11. Click the Layout link in the top right hand corner of the screen. Add a Grid-12 below the 6 x 6 grid.
 12. Click the Content link in the top right corner of the screen.
13. Drag a Paragraph Text Box into the Grid-12 Body Block. Title the Paragraph Text Box "Message."
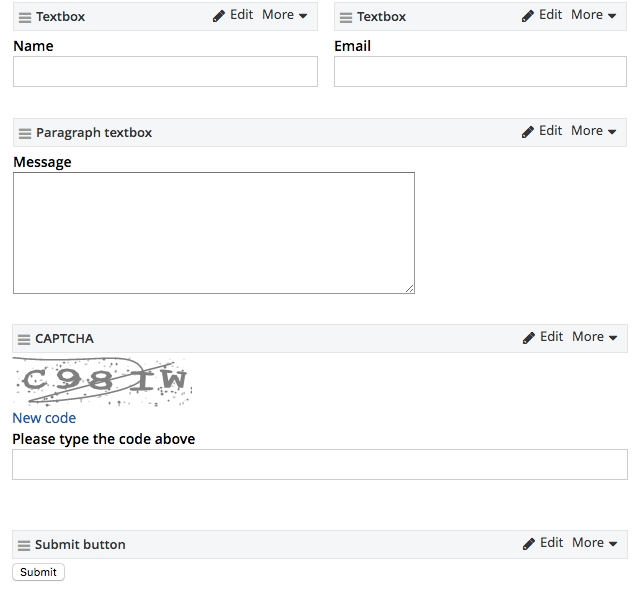
 14. Drag a CAPTCHA Widget under the Paragraph Text Box.
* This step is recommended. Having a CAPTCHA will keep your form safe from bots.
 15. Lastly, you have to enter an email address for the form. Click the settings link in the top right hand corner of the screen.
16. Click the check box that is labeled "list of email addresses."
17. Enter one or more email addresses. These email addresses will be notified when a form is filled out.
* In the event of adding multiple email addresses, separate each email address with a hard return (hitting the enter or return key)
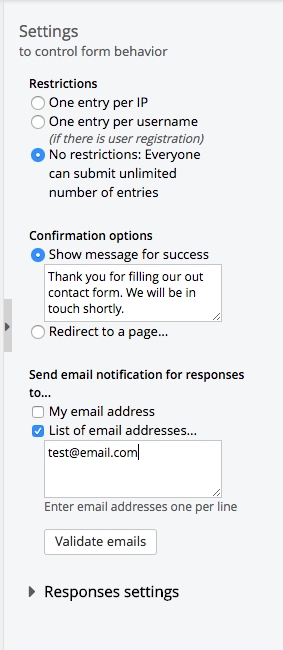 18. Click the Validate Emails Button. A green message will appear if the email addresses are valid and were enter correctly.
 19. Click the green publish button to save your new form.
![]() 20. After publishing the form, you can add it to pages in the page editor.
20. After publishing the form, you can add it to pages in the page editor.
Editing a Form
1. Open the Content tab on the toolbar. Next, click the Form link under Types of Content.
 2. Click the form you wish to edit.
 3. Edit the form using the drag and drop form editor.
* Change the layout by clicking the layout link in the top right hand corner of the screen
* Change settings by clicking the settings link in the top right hand corner of the screen
![]() * Add widgets by dragging them into the content section of the form
* Delete widgets by clicking More > Delete
* Edit widgets by clicking edit
* Add widgets by dragging them into the content section of the form
* Delete widgets by clicking More > Delete
* Edit widgets by clicking edit
![]() 4. Hit the green publish button to save changes to the form.
4. Hit the green publish button to save changes to the form.
![]()
Pre-populated Category field in Call to Action Forms for New & Used Equipment
If this would help you to better organize your sales effort and better track your market share, we will be happy to set this up for you.

Last updated
Was this helpful?